Tuesday, May 14, 2013

Wayfarer's Windfall Cloth with India Flint

Samples stitched together before we cut into them.

Some of my samples.
Plants on wool cloth before rolling.
After dyeing waiting to be opened.
After opening.
Wool cloth wrapped and tied around a found rusty piece from a lantern.

Materials for eco printing.
Tin Thimble, darling shop in a fruit packing barn in Loomis. A must see for any fiber artist.

American River near Auburn, where I stayed. Went hiking on the western states trails.
Hiking in a meadow on Friday.


Tuesday, April 23, 2013

Needle Felted Character

These characters were dry needle felted. The bodies were wet felted.
The funky Gnome is my creation.

Checks and nose are added to the initial head shape.

Top view of nose.

Next you can see the mouth and chin forming.

The eye socket . . .

Ears and color details added next.
The finished piece is a wine cozy.


Baby Quilt

Quilt completed during my annual sewing retreat in March.

Embroidery for baby Weaver.

Back is organic cotton, purchased fabric at Hearts Fabrics in Santa Cruz.

Thursday, February 7, 2013

Chartreuse Nuno Felted Scarf

For the last three years my mother and I have taken a felting class from Judtih Colvin. This year we created a Nuno felted scarf and a hat. We like to try what we have learned on our own; yesterday was a felting day in my kitchen. We purchased silk Devore from Thai Silks in Los Altos. The floral design doesn't take the dye and won't felt with wool fibers since it is a rayon. I like to give credit to Judith, as she came up with this design, and I hope you enjoy seeing this magical process.
Start with 2 1/2 yards of silk, cut the fabric in half to make two scarfs out of the yardage. Trim the edges around the designs that are rayon. This will create a discontinuous edge. Start with bubble wrap or a sheet of plastic (pool cover) with the smooth side facing up, then a sheet of plastic,  and last the silk fabric placed right side down. 
Start with one very thin layer, the fiber overlaps the edge only 1/4".
The second thin layer in opposing directions.
You only need two thin layers of fine merino wool.

Place netting over the area and wet down with cool water and roll up as you move along the length of the piece.
Once piece is completely layered with fiber, start the fulling process. This is the labor intensive part, which can take hours. Using hot water, and soap, you basically "man handle" the piece once you can see the fiber coming through the silk. 
Here is our work space, in my breakfast knock. Risers under my table are a must.
Once you are happy with the size of your piece, you are ready to dye.
Here are the dye pots on my kitchen stove.
Acid dye from Dharma Trading. Acid dyes are used on animal fiber like wool and silk. Mom used Twilight Grey, turned out more like a dark teal. We liked it, but it was not our intention. I choose Chartreuse which matched the sample that Dharma Trading had at the store. I am very pleased with this color.
Chartreuse in the pot.
My kitchen, towels on the floor, so we won't get dye on them. 
Mom's Twilight Grey Scarf
Scarf is still wet
Dried and ironed

Thank you Judith for teaching us. We throughly enjoy this process and are so thankful for you and your sheep. For those that want to try this, you can purchase fiber from Judith at her website:
http://www.judithcolvindesigns.com
If you have the chance to take a class from Judith, I highly recommend it.

Sunday, February 3, 2013

Patchwork Collage Fabric

Have been experimenting with this collage technique using my dyed fabrics. Above is a small bag I made. This was a gift that MaryLou was given at my sew group holiday party. This technique starts with 2" X 2" squares, layers of machine quilting, with a final decoration using the cover stitch on my serger.

Squares laid out and ready to quilt.
Horizontal and vertical stitching, using two different grey threads.

Cover stitch curved over grid.
Finished bag, was given to Sangeeta for a birthday gift.

This combines silk with some of my dyed cotton.

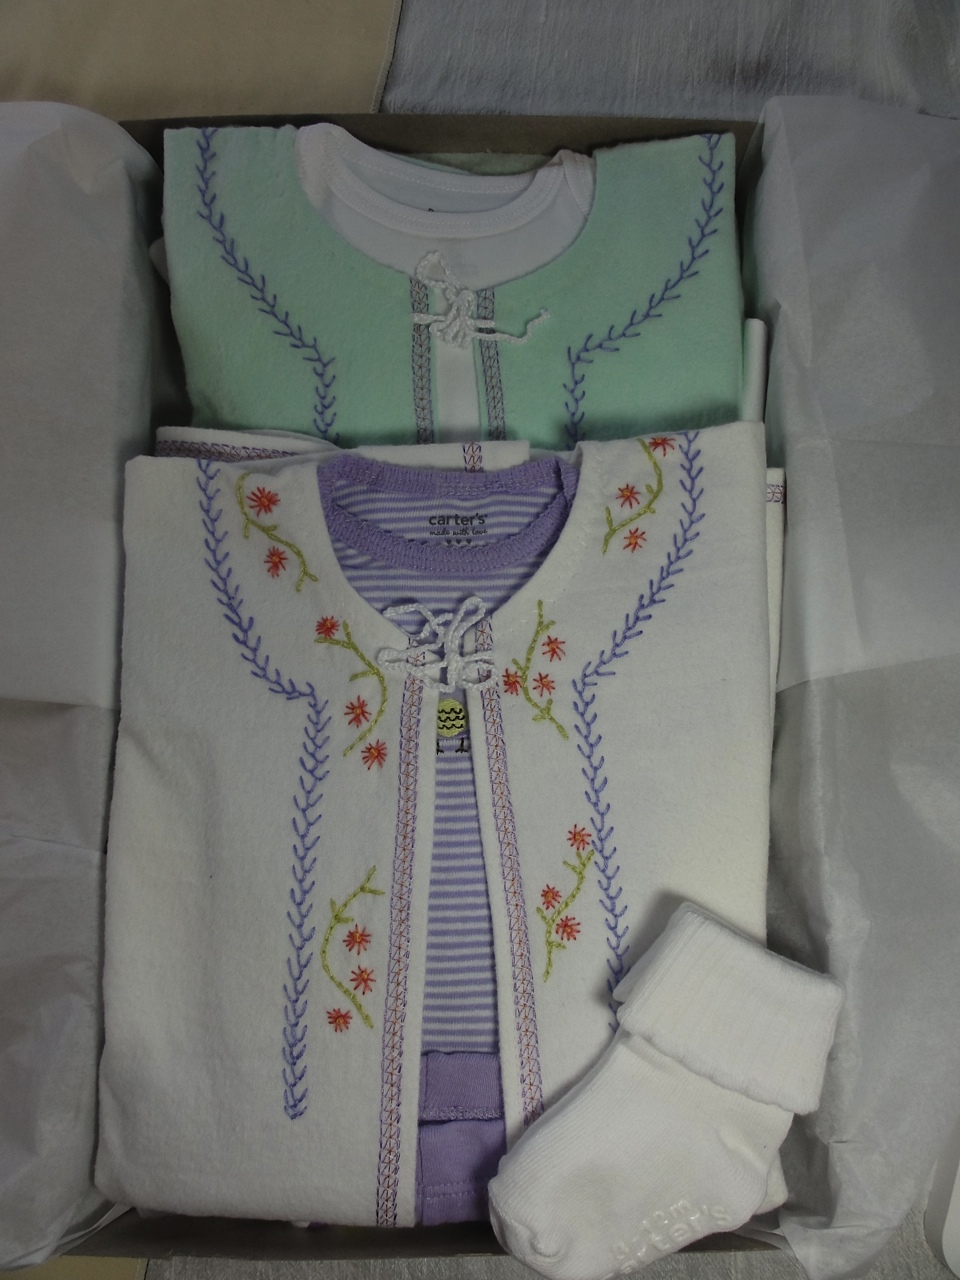
Recipe for How to Dress a Baby


There is a tradition in the Duncan family where all new borns are given handmade kimonos to wear in the first weeks of their life. These kimonos were embellished with crocheted edging and colorful embroider. First created by Doris Duncan (my mom's mother) and her sister Florence in the 1930s for Dean and Beryl Duncan. My mother wore them in 1934, I wore them in 1957, along with my two sisters that came after me. Cullen wore them in 1985. Holly wore them in 1987 and they were passed along to my sister's children. I wanted to continue this tradition, by making some new ones for Kaya. In place of crochet I used my serger with decorative thread. Here they are. Kaya, Michelle and Karl's baby is due any day now. We are so excited to meet her.


Monday, January 21, 2013

Gnome Felt Ornament


This felt ornament design was a collaboration between Beryl Meuli, my niece Britta Chaska, and myself. We each made a Gnome and I will post the other two later. This guy is mine. The curly hair comes from Judith Colvin's Blue-faced Leicester sheep she raises in Montana. The green and blue felt used in the jacket I made from pre-dyed wool fiber, using a wet felting method. The other felts were purchased. I used some needle felting to create the creases in his hat. This guy has been a year in the making, he was originally going to be a elf fairy. We went to work beginning Saturday and worked two straight days to finish.
Front view
Cute little bum.
Back of jacket shows his pleat.
Curly bits from a sheep.
Stocking are embroidered with a chain stitch.
His bum was shaped using needle felting.